002-使用Swagger2为项目添加API文档
之前我们已经能够完成最最简单的CRUD,哪怕作为一个小型的项目来讲,这也是远远不够的。 在添加一些其他配置之前,我们首先要了解我们这个小项目主要是为服务端开发restful接口提供了一个开箱即用的脚手架。无论之后我们是不是会开发前端项目,用来约定和限制的文档自然是必不可少的。 今天我们就通过Swagger2来自动生成Api接口文档。
# RESTful Api 和 Swagger2
# RESTful Api
我看过阮一峰老师的一篇文章,他曾经对RESTful进行一个解释:
- 每一个URI代表一种资源;
- 客户端和服务器之间,传递这种资源的某种表现层;
- 客户端通过四个HTTP动词,对服务器端资源进行操作,实现"表现层状态转化"。
下面我保存了几篇设计规范和实践的文章,供参考:
- RESTful API 设计指南 (opens new window)
- RESTful API 最佳实践 (opens new window)
- RESTful API 设计规范 (opens new window)
# Swagger2
简单的讲,我们可以理解为为了方便前后端开发人员对于Api接口的沟通,利用Swagger2动态生成一套Api接口文档,这样既能够节约成本,也能够避免因为人为操作产生不必要的错误。
# 集成Swagger2并生成文档
# 添加依赖
implementation "io.springfox:springfox-boot-starter:3.0.0"
# 写测试接口并查看效果
为了能够更好的查看效果,我们需要在上一篇采用mybatis-plus generator生成的controller中,写几个测试用的接口。
package com.liuyang19900520.layman.starter.module.test.controller;


import com.liuyang19900520.layman.starter.module.test.entity.StarterTest;
import com.liuyang19900520.layman.starter.module.test.service.StarterTestService;
import org.springframework.beans.factory.annotation.Autowired;
import org.springframework.web.bind.annotation.*;

/**
 * <p>
 * 测试用 前端控制器
 * </p>
 *
 * @author Max Liu
 * @since 2020-09-11
 */
@RestController
@RequestMapping("/test")
public class StarterTestController {

    @Autowired
    StarterTestService starterTestService;

    @GetMapping("/users")
    public Object users() {
        return starterTestService.list();
    }

    @GetMapping("/users/{id}")
    public Object user(@PathVariable String id) {
        return id;
    }

    @PostMapping("/users/")
    public Object postUser(StarterTest starterTest) {
        return starterTestService.save(starterTest);
    }

    @PutMapping("/users/{id}")
    public Object putUser(StarterTest starterTest, @PathVariable String id) {
        starterTest.setId(Long.parseLong(id));
        return starterTestService.updateById(starterTest);
    }


    @DeleteMapping("/users/{id}")
    public Object deleteUser(@PathVariable String id) {
        return starterTestService.removeById(Long.parseLong(id));
    }

}
2
3
4
5
6
7
8
9
10
11
12
13
14
15
16
17
18
19
20
21
22
23
24
25
26
27
28
29
30
31
32
33
34
35
36
37
38
39
40
41
42
43
44
45
46
47
48
49
50
51
52
53
54
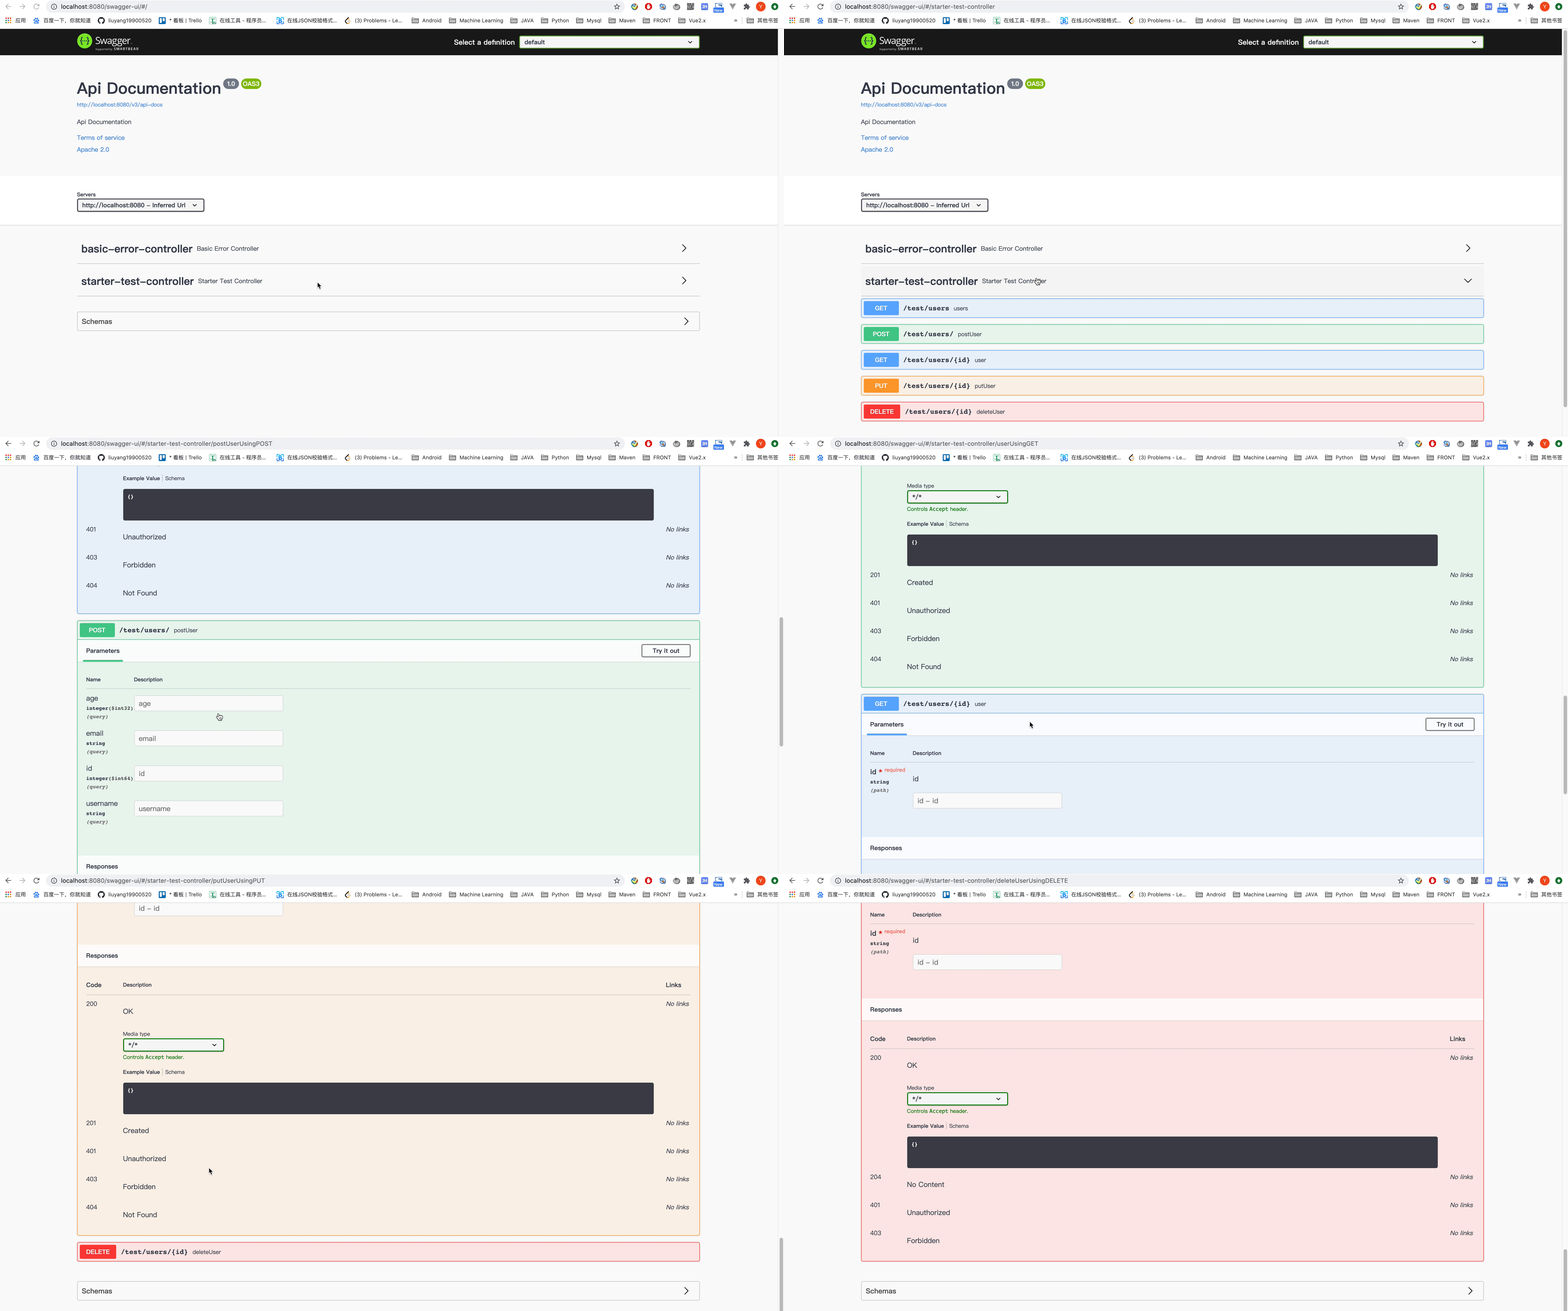
之后我们访问http://localhost:8080/swagger-ui/ 就能够查看我们刚刚实现的效果。
 但让这只是默认配置的效果,我们还可以通过添加自己的配置,使得接口文档更加丰富化。
# 添加Swagger2的配置
我们添加了一个新的ui依赖,并且修改了一些简单的配置。如下:
@Configuration
@EnableSwagger2
public class SwaggerConfig {

    @Bean
    public Docket createRestApi() {
        //设置全局响应状态码
        List<Response> responseMessageList = new ArrayList<>();
        responseMessageList.add(new ResponseBuilder().code("200").description("请求成功").build());
        return new Docket(DocumentationType.SWAGGER_2)
                .pathMapping("/")
                .select()
                //报名不能设置通配符*
                .apis(RequestHandlerSelectors.basePackage("com.liuyang19900520.layman.starter.module"))
                .paths(PathSelectors.any())
                .build().apiInfo(apiInfo());

    }

    private ApiInfo apiInfo() {
        return new ApiInfoBuilder()
                .title("layman-starter接口文档")
                .description("layman-starter接口文档,测试使用")
                .version("0.0.1")
                .contact(new Contact("Max Liu", "https://www.liuyang1990520.com", "liuyang19900520@hotmail.com"))
                .build();
    }
}
2
3
4
5
6
7
8
9
10
11
12
13
14
15
16
17
18
19
20
21
22
23
24
25
26
27
28
我们也修改了mybatis-plus generator的配置,这样在逆向生成实体类的时候,也能带有我们Swagger2的注解。
globalConfig.setSwagger2(true);
这样我们再次生成module下的文件进行,得到了支持swagger2的实体类。
# 设置共通返回值
作为api接口,我们常常会采用一些共通的返回值,比如code,msg,data等等,这样方便前端的工程师在解析数据之前进行判断。这部分代码就不再粘贴了。需要注意的事,CommonResult类中的data属性,我们需要使用泛型而非Object作为类型,因为swagger2的转换中需要。
# 再次修改controller进行测试
@RestController
@RequestMapping("/test/starterTest")
@Api(tags = "用户管理相关接口")
public class StarterTestController {
    @Autowired
    StarterTestService starterTestService;

    @GetMapping("/users")
    @ApiOperation("显示用户一览")
    public CommonResult users() {
        return CommonResult.success(starterTestService.list());
    }

    @GetMapping("/users/{id}")
    @ApiOperation("显示当前用户")
    public CommonResult user(@PathVariable Long id) {
        return CommonResult.success(starterTestService.getById(id));
    }

    @PostMapping("/users/")
    @ApiOperation("添加用户")
    public CommonResult postUser(@RequestBody StarterTest starterTest) {
        return CommonResult.success(starterTestService.save(starterTest));
    }

    @PutMapping("/users/{id}")
    @ApiOperation("修改用户")
    public CommonResult putUser(@RequestBody StarterTest starterTest, @PathVariable Long id) {
        starterTest.setId(id);
        return CommonResult.success(starterTestService.updateById(starterTest));
    }

    @DeleteMapping("/users/{id}")
    @ApiOperation("删除用户")
    public CommonResult deleteUser(@PathVariable String id) {
        return CommonResult.success(starterTestService.removeById(Long.parseLong(id)));
    }

}
2
3
4
5
6
7
8
9
10
11
12
13
14
15
16
17
18
19
20
21
22
23
24
25
26
27
28
29
30
31
32
33
34
35
36
37
38
39
40
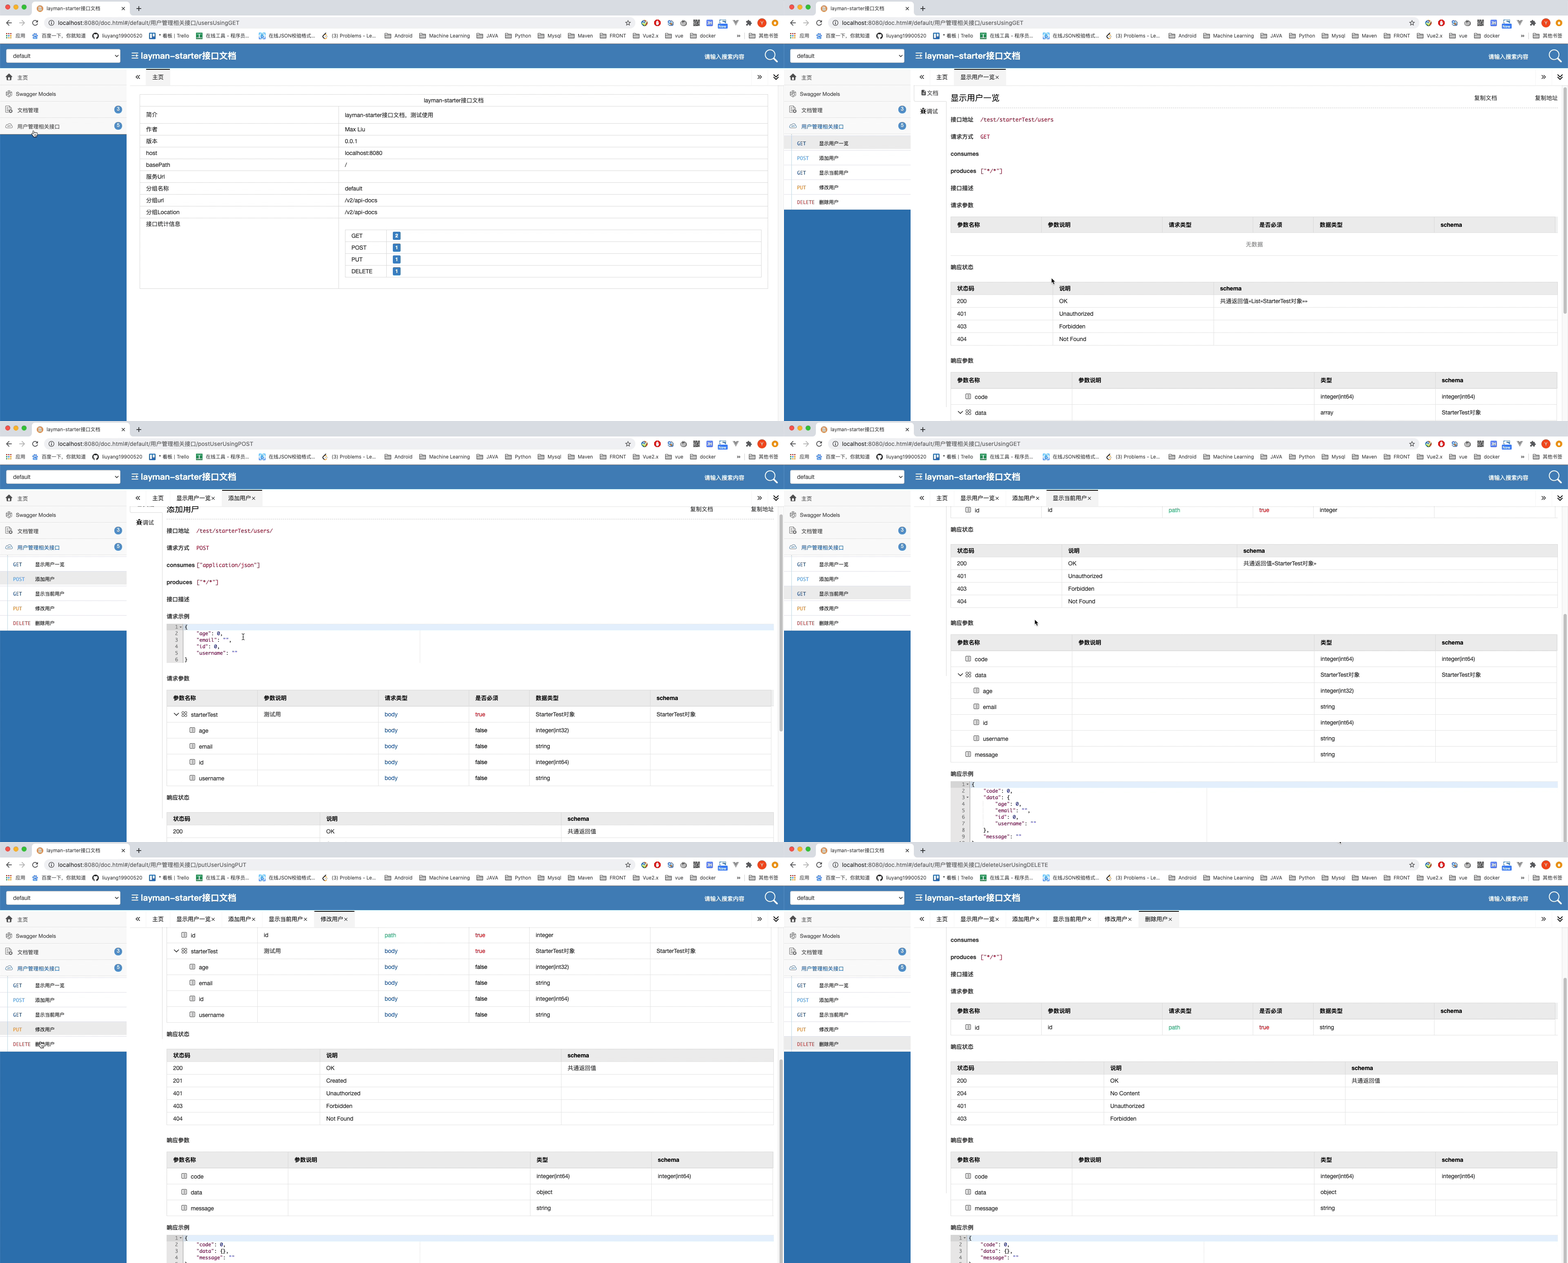
可以看到我们为每一个路由都添加了一个注解在解释,让我们看一下效果。注意,由于配置新的UI,路径变为了http://localhost:8080/doc.html
 截止到这里,我们就算简单的配置完成了Swagger2接口文档。